Saturday, July 4, 2009

Smoke and Mirrors


Yeah! I have successfully completed the 21 day 6am yoga challenge! I actually loved it! Being up that early made the days go on forever. I’m actually keeping it up at home, the yoga that is, not the 6am part!!!!

I’ve been neglecting you...I apologize. What can I say? I got distracted, my husband’s 60th, a sick friend in hospital ... you know… life… but… just for you, my devoted reader…readers…? As promised I will tell you about ….smoke and mirrors….well … wallpaper and mirrors.

In our bedroom the 8 closet doors have mirrors. I like the closet space but if, like me, you are over 50 waking up to a shocking glance of your thighs laden with cellulites… magnified 8 times! Nobody deserves such a rude awakening!

As though that wasn’t enough…, another huge mirror aggressively lurked over me at the head of the bed! Mirror, mirror on the wall…who has the most wrinkles of them all? It seemed to mockingly say…

I don’t know about you but a softer landing in the morning would be more humane don’t you think?
Something had to be done! I said NO to mirrors, I chose to no longer be victim to all that exposure.
I decided to cover the mirror at the head of the bed with wallpaper. It made a dramatic change to the room, it was quick and cheap.

I pleated the paper at the top to make it look like blinds. It just adds a little depth. Now the room is a lot softer and my step is a little lighter.
The closet mirrors are still there… they are my incentive to keep up with the yoga.

Tuesday, June 16, 2009

Di-vine Garden Wedding

I promised mirrors and wallpaper next …it will just have to wait!
Back to the wedding...

A long time friend’s son was getting married so I quickly offered my services as decorator. She was thrilled. Little did she know that I was doing it for purely selfish reasons. You see…I had to feed my décor addiction!!!

Before...


After...

First meeting…
the Where and What
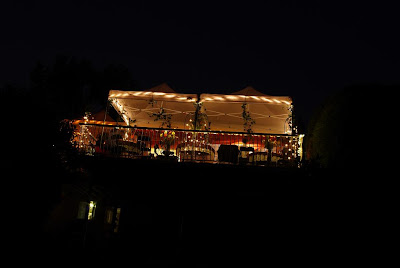
Their large deck overlooking a magnificent garden was a natural setting for an intimate group of 43 guests.That was a no-brainer! And would you believe that the neighbour just happens to be an event planner!!! What are the odds? We had access to tents, lights, candles and other treasures“free of charge!!
(That really tickled the “bargain Queen” side of me. At this point I felt like dancing.)

NEXT … Tables…rectangular or round? Sounds trivial but the tables set the mood and I ‘m thinking… French café on the Riviera (I’ve never been there but hey… it sounds sooo romantic and what better place for romance than a café in a “secret garden” ) I’m rambling, but my mind is going in a million directions. Ohhh, the possibilities…Exciting stuff…Ah yes… tables. Personally, I much prefer round tables sitting 4, 6 or 8 depending on the number of guests and space available. Done! 6 tables of 6 and 2 tables of 4. We are on a roll!

NEXT…Ahhh …a little flutter…my favourite part … fabric. AND, I’m not talking tablecloth, that’s a given, I’m thinking flowy, shiny, sheer. Some men may find such language offensive. Sorry but it just needed to be said. After all, the bride, being a divine Goddess, expects nothing less on this day of declaring her devotional love to the man of her dreams…too much?… too Harlequin? Oh heck! Corny maybe… but there was definitely magic between these two love birds. I’m a sucker for a good love story.

NEXT…Colours! The mother of the groom chose the colors based on one of the Bride’s favourite , tangerine, which was to be the main color for flowers with yellow and white. Brown and cream for the tablecloths, a little gold here, a little orange there….
Very yummy…earthy.

By now I bet you are looking for a “OOPS” right? Almost wishing I had one. I forgive you. We all have that little dark mean side inside us. You won’t be disappointed!

The day before the wedding…

The groom’s mother is still standing…
Terry and Manfred had done a great job setting up the tents and the lights. I could go straight to the fabric. Flowy golden burnt orange fabric is used to create an amazing cozy warm ceiling which transformed the overhang of the deck .Other gorgeous fabrics are used to cover posts, windows and doors .We have fabulous flowers… and get this…Veronika from Austria, mother of the bride, just happens to do flower arrangements as a hobby! She may struggle with her English but she is a virtuoso with plants. Danka! All the treasures from the neighbours stash are in place .We are so excited! Mission accomplished.

Centrepieces for the tables...


Then… as obvious as the proverbial white elephant in the room...the roof of the tents are bare!!!! It was unacceptable! All that exposed metal! It was indecent! I’m thinking 911! What to do?

Then, AHA! (I know you were waiting for that one too!) We are in the middle of a garden, talk about not seeing the forest for the trees. I’m thinking leafy branches, ferns Heck! Anything green, I’m desperate. In her broken English, Veronika squeezes out the word “vines”. YES!!! No vines in this yard, so off goes Louise and Veronika on a quest for vines. Success! The vines saved the day. One is tempted to say it was “Di-vine intervention!”

Darn, I haven’t mention the tablecloth oops yet .This blog is already way too long…toooo bad .It was a good one. Shut up Denyse…

Pictures are worth a thousand words. Go ahead take a peek!

Ready for the guests...

The floating flowers in water were
the centerpieces on the food tables.


Adding a few petals and leaves on the table added a little interest.


Posting pictures of the bride and groom at different stages in their lives on posts and windows was a hit.


Simple and sweet...


Views from below...

It was an honor for me to witness this celebration of love.
All you need is love pam, pa pa pam :) I'm such a romantic...


Wednesday, June 10, 2009

Boudoir Curtains

I am so enjoying my boudoir chair, it is so yummy (see last project). And yes…it’s still waiting for that second coat of stain…I’ll get to it! …eventually…I promise…).

My idea was to have a perfect balance between masculine and feminine energy in the bedroom …after all… I do share my bed with a wonderful man and we can always use a little inspiration. The dark luxurious masculine curtains next to the chair give a sense of harmony.
This next part is NOT to be repeated, after all, my reputation may be at stake. I’m counting on you. DO NOT proceed if you can’t keep a secret. Are you sure? This is very embarrassing (deep breath).

Look closely at the grommets at the top of the curtains you will see that there are seven per curtain panels. Did you know that it needs to be an even number? I didn’t! The end of the “waves” at the edges of each panel, which are created by the grommets, should be facing the window, otherwise it flips outwards and you see the lining!!! OOPS!!!!

Too late… the blackout lining is already sewn in….way too much work to start from scratch and then add a piece. I can live with it …so I tell myself. It looks good enough… (not a perfectionist, remember?) but something is bugging me…can’t quite put my finger on it. Damn! ...I mean darn, shoot …I notice that the fabric above the grommets is not quite right. It looks odd. Off to the bathroom to check out the space above the grommets on my shower curtains.

Of course! Instead of 1 inch of fabric above the grommets I should have left at least 2-3.
Way more elegant! DUH! This set back was not going to take me out…no way I was going to give up…I’m very persistent. And then it happened… the AHA moment! I’m thinking…the fabric has horizontal stripes! Yeah! A piece of cake….

All I needed to do was add a piece of fabric at the top, the stripe would hide the seam and, best of all, it did not interfere with the lining! Life is good! With a straight pin I folded the outer edges so the lining does not show after all. When there is a will…

I loved the curtains but there was still something missing…it needed a little “Je ne sais quoi…” I left it for a few days. Then, needing my fabric fix I ended up at Fabricland.

At the corner of my eyes I saw some shiny BLUE bling at 50% off, I HAD to check it out! Ahhh …the Goddess touch! (Take a close look at the bottom of the curtains, just above the taupe coloured piece of silk, the blue bling) The feminine wink!
Now I’m happy!!!!!

PS
Last week, I agreed to start a yoga class for 21 consecutive days at 6am!!!! I’m retired! What was I thinking? I can tell you that I FULLY enjoy the black out curtains when I have to go to bed at 9pm and it’s still light outside!!!!!

PPS
Thanks for dropping by. Come again next week, I’ll tell you about mirrors and wallpaper.

Tuesday, June 2, 2009

My New Boudoir Chair

This is yesterday's project. It took me a day.

Here's the before...

I just completed redoing the bedroom and there was a corner that needed a small chair to soften and balance the room. You have to understand that I like things done yesterday so this called for an emergency trip to VV boutique (my favorite Value Village outlet). And ...there it was, the perfect chair for $19.99.

Polka dot is not my thing so... off to Fabricland (another favorite) to get fabric. I always carry with me pieces of fabric or paint chits of the project of the day...along with a measuring tape and my camera. Soooo, I'm thinking turquoise blue...not sure if I want stripes or solid. Quick peruse throught the cheap section at the back, my heart is pounding...I spot it...there it is in all its glory...a turquoise lamb velvet (never heard of lamb velvet!) at 50% off!!! So $14.00 later I can't wait to get home to get started.

This is an easy one, no sewing required. I'm thinking...I can get this done before the day is over.

Perfectionists, abstain!!!! I have my own vocabulary to describe tools and such...stay tuned for the video clips I will be adding sometime in the future.

How to:

Step 1-Remove the fabric piece by piece (to use as my pattern). On the pieces I write B for back, S for seat, you get the idea. The first layer you remove will be the last you will replace.

I use a flat head screwdriver and a pair of pliers to remove the staples and small nails.

I save pieces I can reuse (strips inside the pleats, light fabric under the chair,usually black or white).

Step 2-For this chair I wanted the wood darker. I used left over black stain (follow the instructions on the can).

It needed to dry overnight but...remember I wanted it done yesterday. After a few hours it was still sticky but I couldn't wait. Using my pattern I cut the new fabric and stapled it piece by piece. That's when the oops! happened...I had stain all over my pants and my hands but... not on the fabric!!! Yeah...no reason to stop. I completed the chair by the end of the day. I will need to put another coat of stain...very carefully!

My advice:

Do not do as I do. Do the stain, wait until it completely dries, then proceed with the fabric. Did I say I was definitely not a perfectionist?

End result...It looks amazing and my soul is happy.

...here's the after.